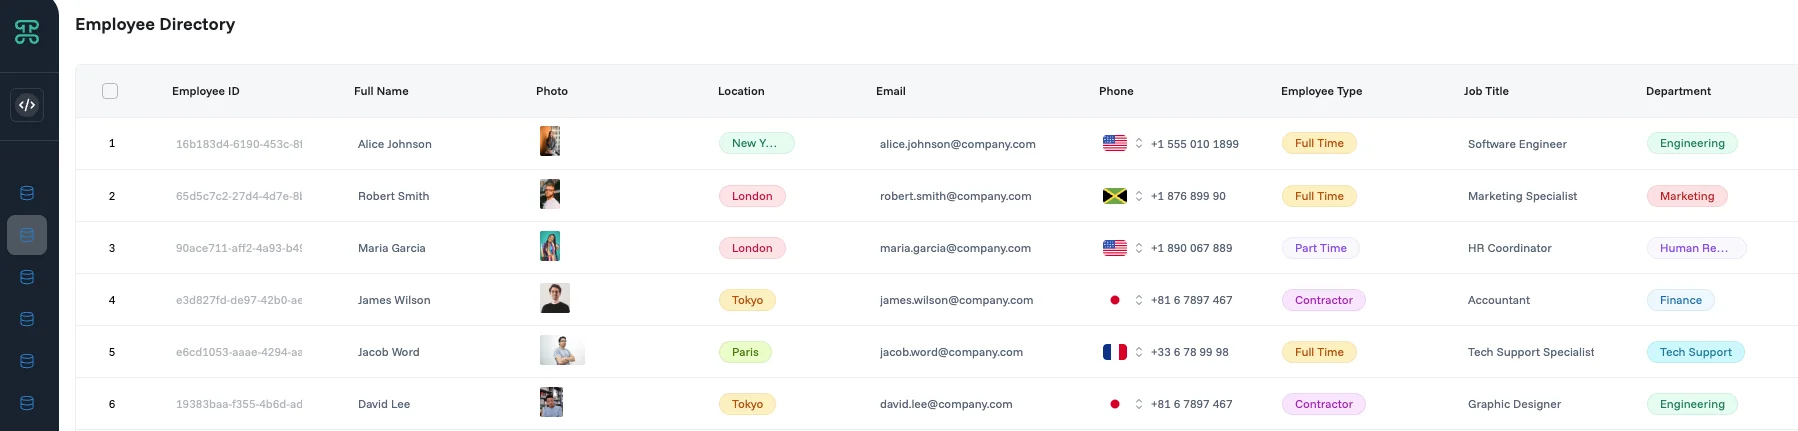
Everything you build in Proma starts inside a system. Every system is made of building blocks, and the dataset is the first one you'll create. Before you add anything else, answer one question: what are the things I'm tracking? Customers. Orders. Tasks. Each one becomes its own dataset. A dataset is a structured list of one type of record. Every row is one item, and every column is one detail about it.
Getting this structure right early makes everything else easier. A deadline stored in a Date column can trigger a reminder or sort your records by urgency. The same deadline typed into a Text column is just words on the screen, and Proma can't calculate with it. The column type determines what Proma can do with your data later.
Create a dataset
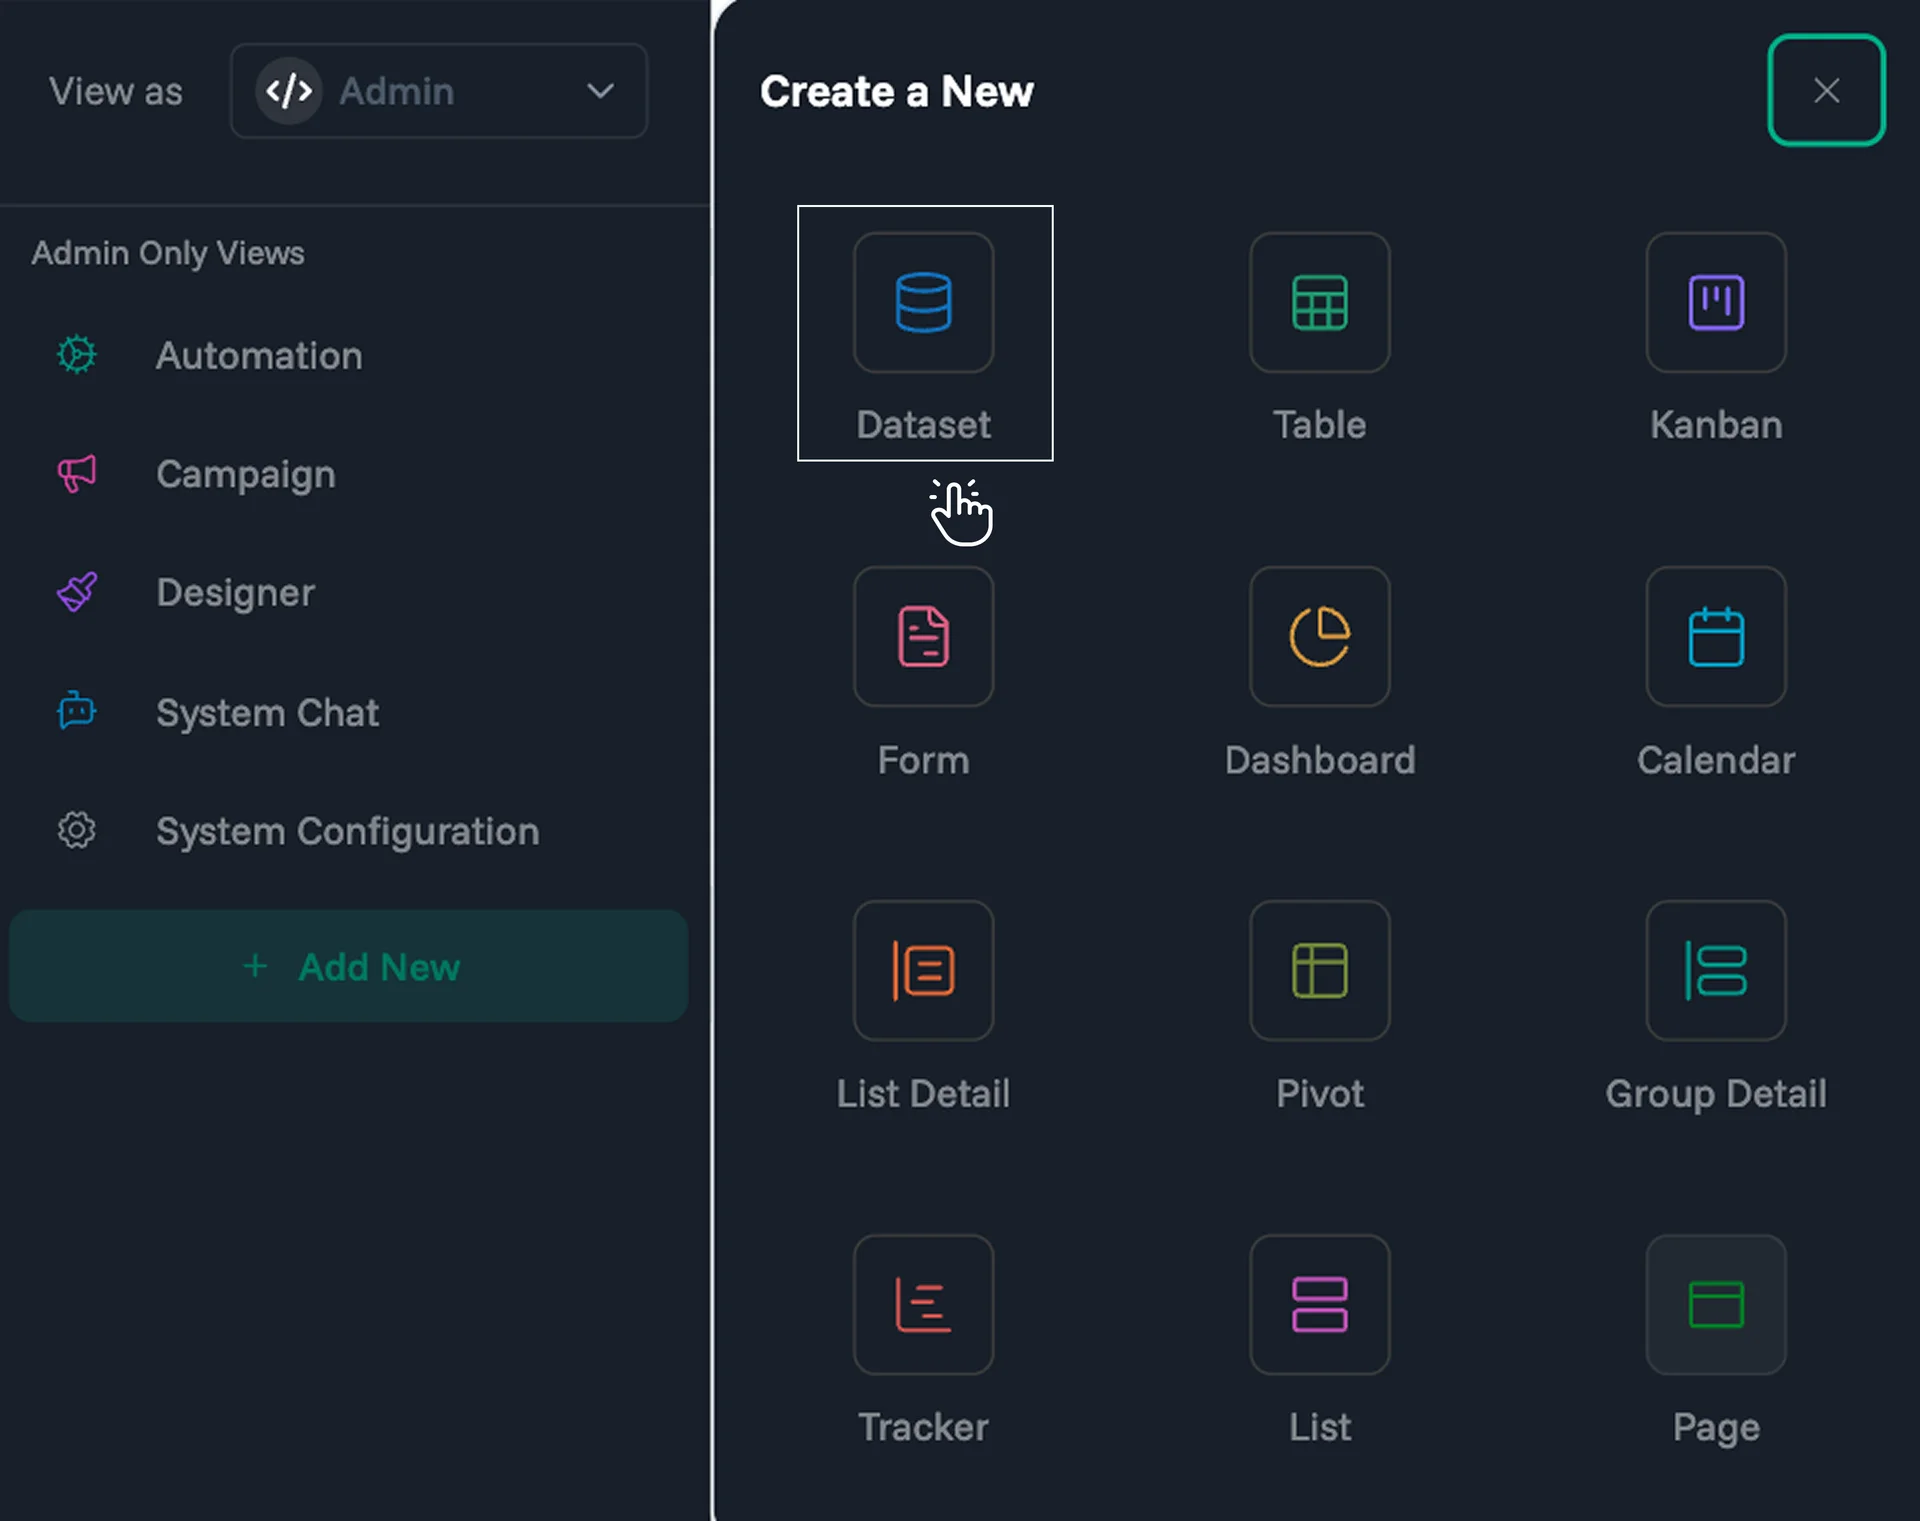
Datasets are created inside a system. Open the system you're building, click + Add New in the sidebar, and select Dataset from the Create a New panel.
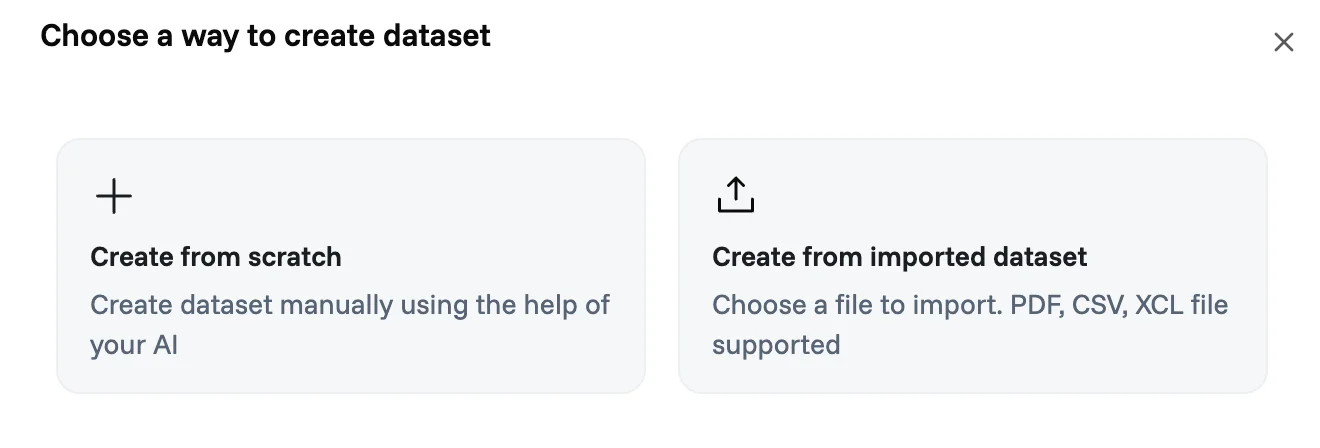
You'll be asked to choose how you want to create it:
Option | Best for |
Create from scratch | Building a dataset manually, with AI-assisted column suggestions |
Create from imported dataset | Bringing in data you already have as a PDF, CSV, or XLS file |
Option 1: Create from scratch
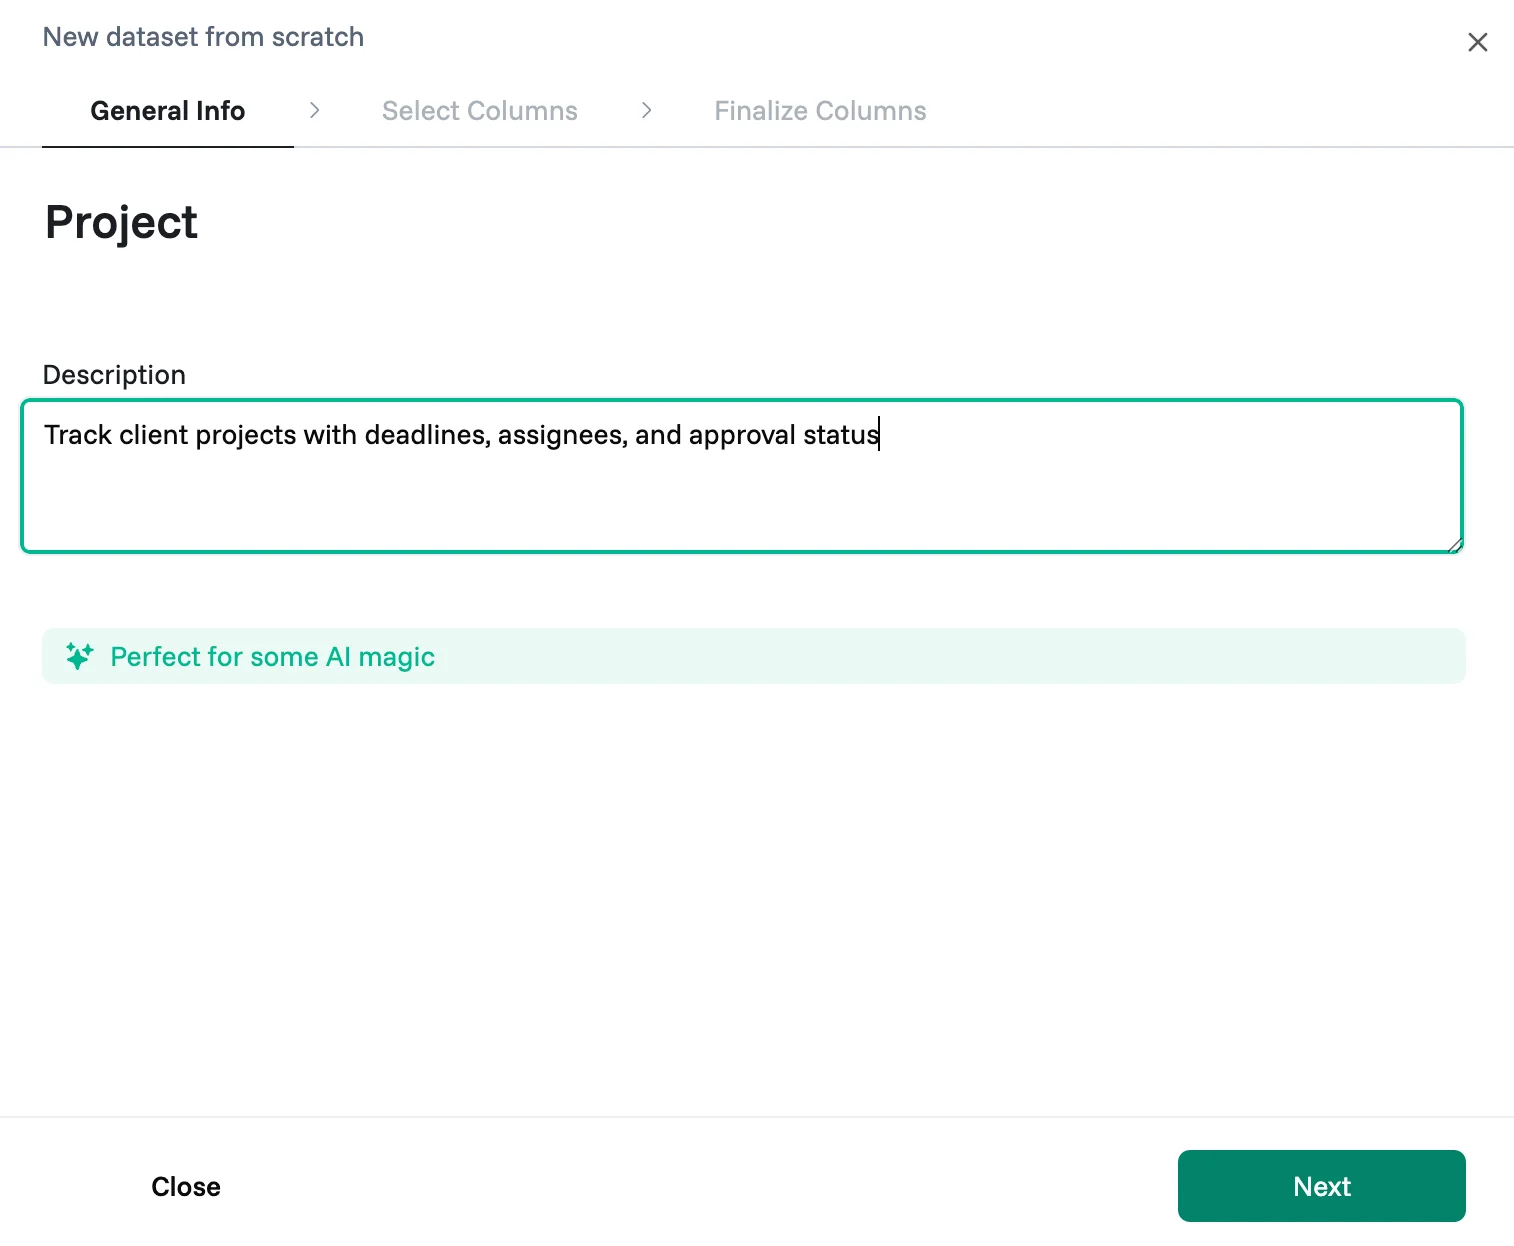
Name your dataset. Give it a name and a description. Proma's AI uses the description to suggest relevant columns, so be specific. "Track client projects with deadlines, assignees, and approval status" gets you better suggestions than "Create a project dataset."
Select columns. Proma's AI suggests columns based on your description. Suggestions aren't added automatically. Click ✓ to add a suggestion to your Selected Columns, or ✗ to dismiss it. You can also:
Change a suggested column's type using the dropdown next to it. Column types (Text, Number, Date, Email, and more) control what kind of data the column accepts. See Smart Columns for the full list.
Add your own column by entering a name and type in the field at the bottom of the panel.
Click Get more AI suggestions for additional recommendations.
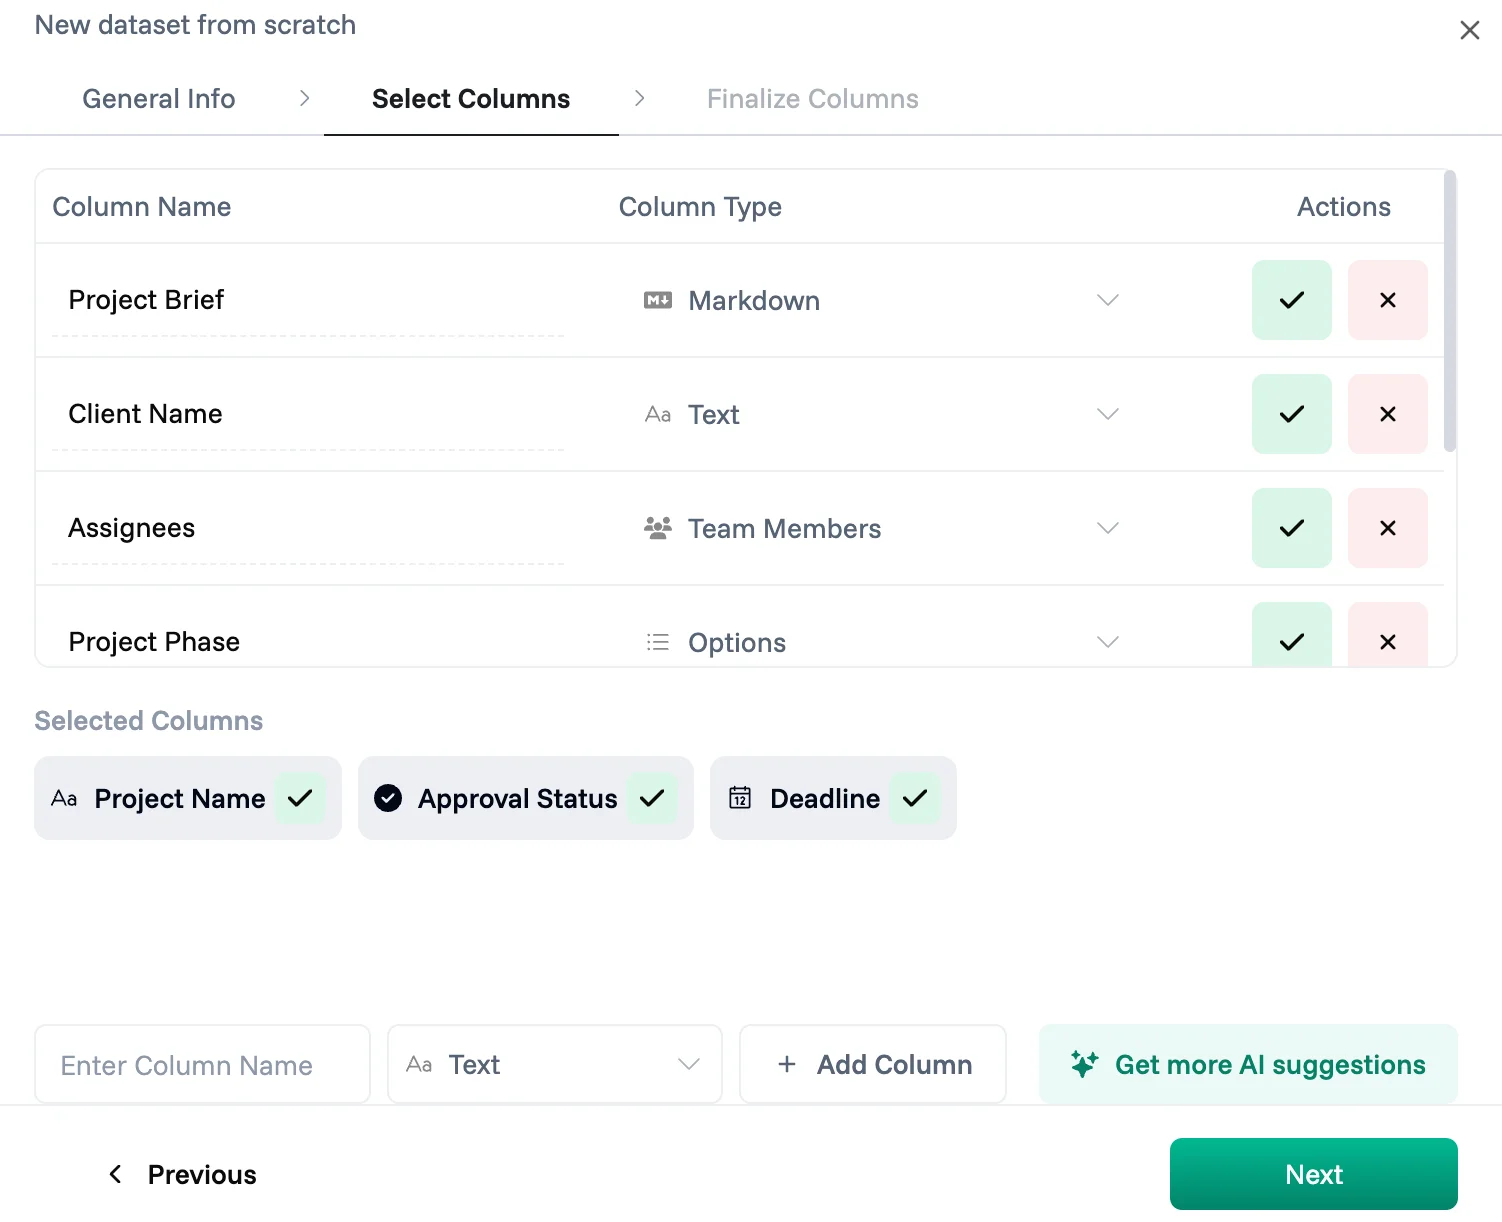
Finalize columns. Review each column one more time. Select a column from the list on the left to edit its name, type, and any type-specific settings, such as min and max values for Number columns. Click Finish when you're done.
Your new dataset opens in table view, ready for records.
Option 2: Create from imported dataset
Use this option when your records already exist somewhere else, such as a spreadsheet you exported from another tool. Your file should contain structured data with a row of column names at the top. Proma reads those names and walks you through mapping each column to a column type.
Upload your file and name the dataset. Upload a PDF, CSV, or XLS file. Proma fills in the dataset name from the filename. Edit it if needed, add an optional description, and click Next.
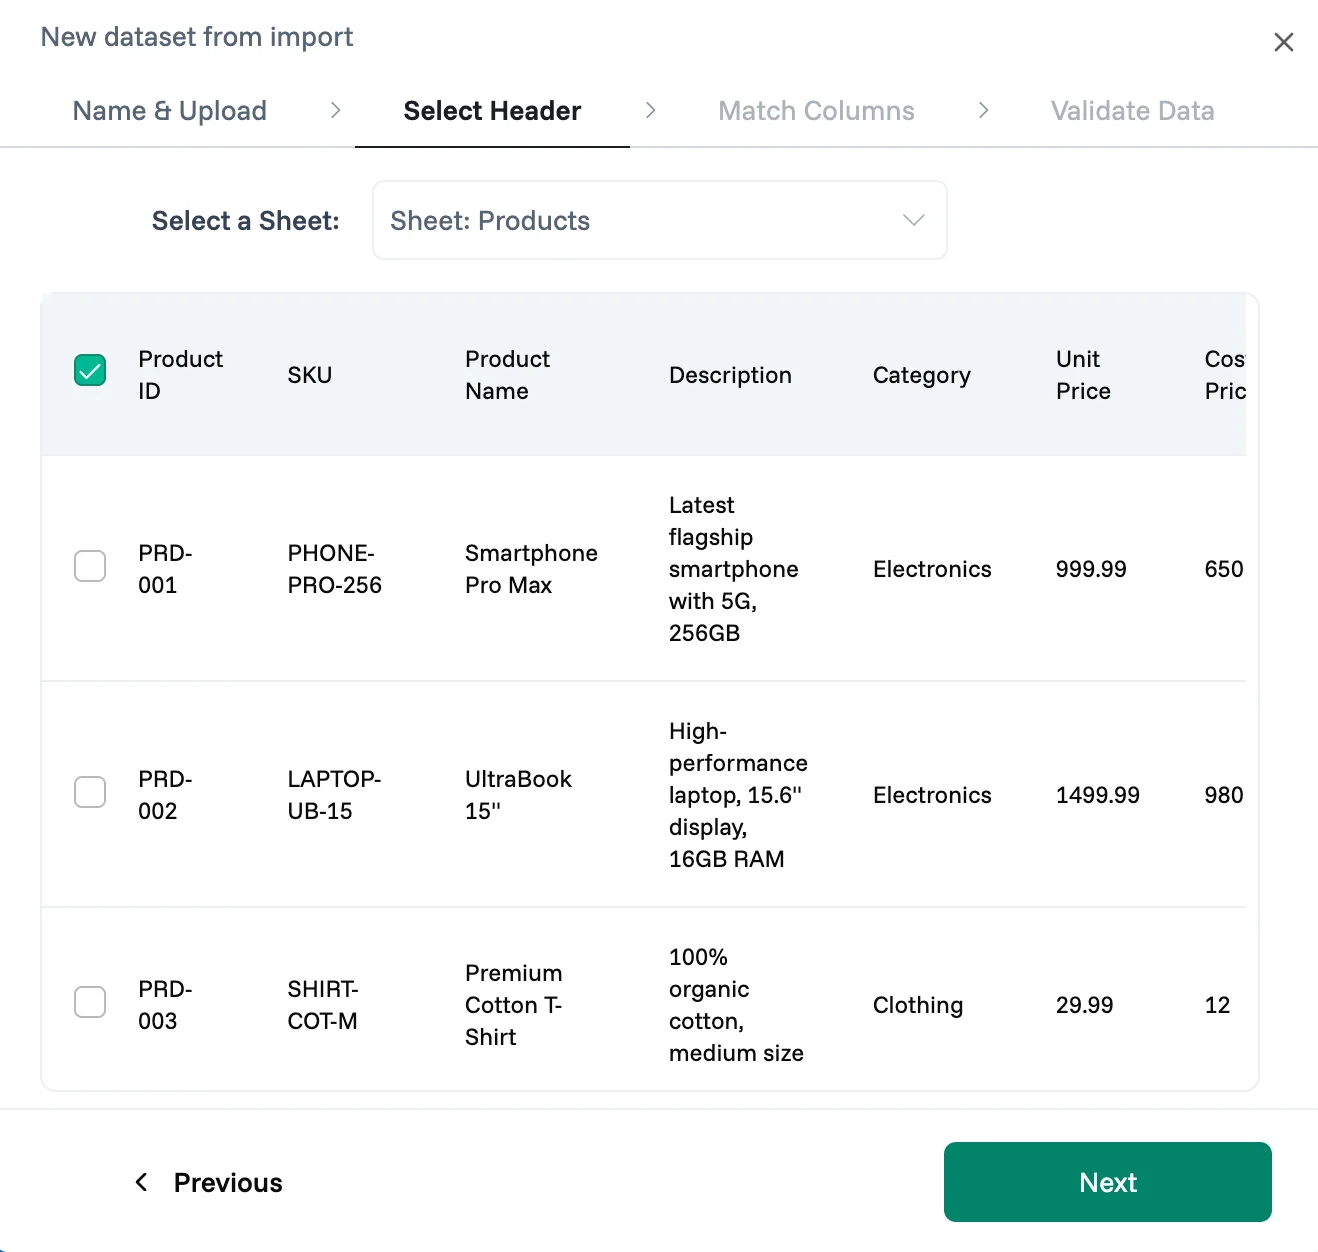
Select the header row. If your file has multiple sheets, choose which one to import from the Select a Sheet dropdown. Then select the row that contains your column names and click Next.
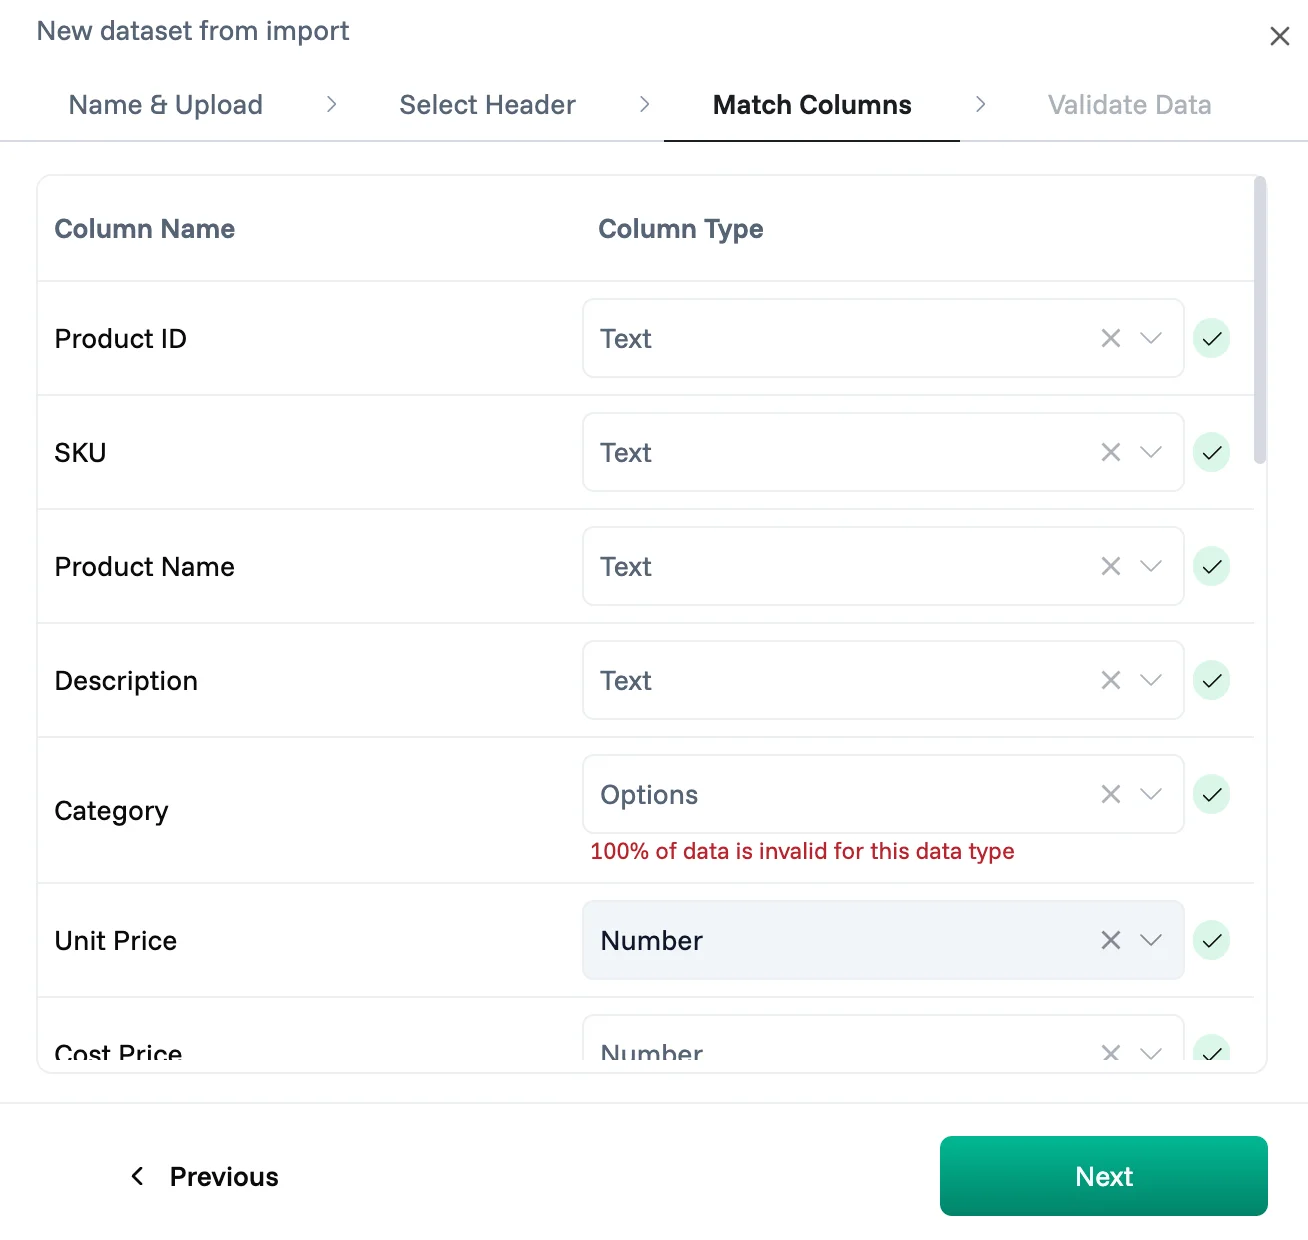
Match columns to data types. Proma maps each column from your file to a column type. If a type doesn't fit your data, you'll see a validation warning below the column, such as "100% of data is invalid for this data type." To resolve it, change the column type to one that matches the data. For example, if Options doesn't fit a free-text column, switch it to Text. Click Next once every column is valid.
Validate and import. Review a preview of your records and deselect any rows you don't want to bring in. Click Import Dataset to finish.
Your new dataset opens in table view with your imported records in place.
Add columns to your dataset
Your dataset isn't locked after creation. To add a column, open the dataset and click + Add Column at the right end of the header row. The column panel gives you two ways to build it:
Design. Configure the column yourself. Set the Column Name and Column Type, mark it as Required if every record needs a value, and adjust type-specific settings such as Max Length for Text columns.
Use Recommended. Pick from columns Proma suggests for your dataset.
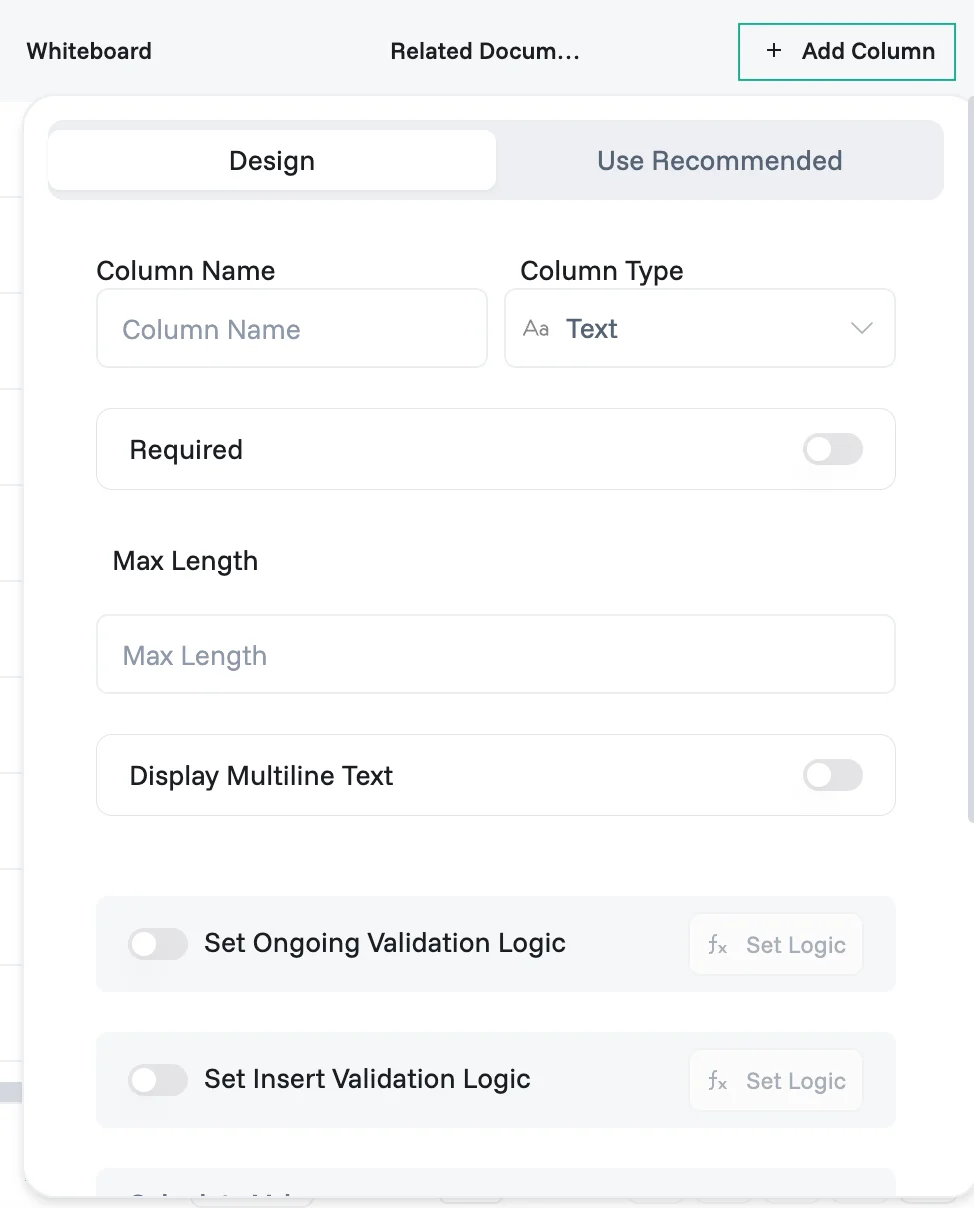
Each column also carries its own logic settings for validating data as it's entered. Learn more in Smart Columns .
Dataset structure
Element | What it is |
Row | One record. A single customer, order, or task. |
Column | One data field with a defined type, such as Text, Number, or Email. Each column has type-specific settings and logic for validating data, calculating values, and triggering actions. Learn more in [Smart Columns]. |
Best practices
Define your intent before you build. Ask yourself: what is this dataset tracking, who uses it, and what decisions will it inform? The clearer your intent, the better your structure and the better Proma's AI suggestions.
One dataset, one thing. Each dataset should represent one type of thing: customers, tasks, invoices. If you find yourself adding columns that belong to a different subject, that's a signal you need a second dataset.
Name things clearly. "Customer Contacts" is easier to work with than "List 2." Consistent naming speeds up building logic and automations later.
Start simple. Build for your core use case first, then expand. Adding columns later is easy. Untangling a structure that grew too fast is not.
Next steps
A dataset holds your data. The other building blocks put it to work:
Smart Columns - Explore the full range of column types and their settings
Interfaces - Build views, forms, and dashboards on top of your datasets
Logic Composer - Add conditional logic that validates, calculates, and reacts to your data
Automation Engine - Trigger workflows when records are created or updated
Have questions? Our team is ready to help at support@proma.ai