Datasets are built from rows and columns. Rows hold individual records, and columns define the fields that structure your data. For example, in a customer dataset, each row is one customer and each column is a detail you track about them, like name or status. Here's how to add, edit, and manage both.
Working with rows
Add a row
Click + Add Row at the bottom left of the dataset. The Edit Row panel opens so you can fill in the fields for the new record right away.
The panel label matches how records are named in that dataset. In a customer dataset, for example, the button opens an Add New Customer panel.
View and edit a row
Hover over any row and click the eye icon to open the Edit Row panel, where you can view and edit all fields for that record in one place.
Inside the Edit Row panel you can also:
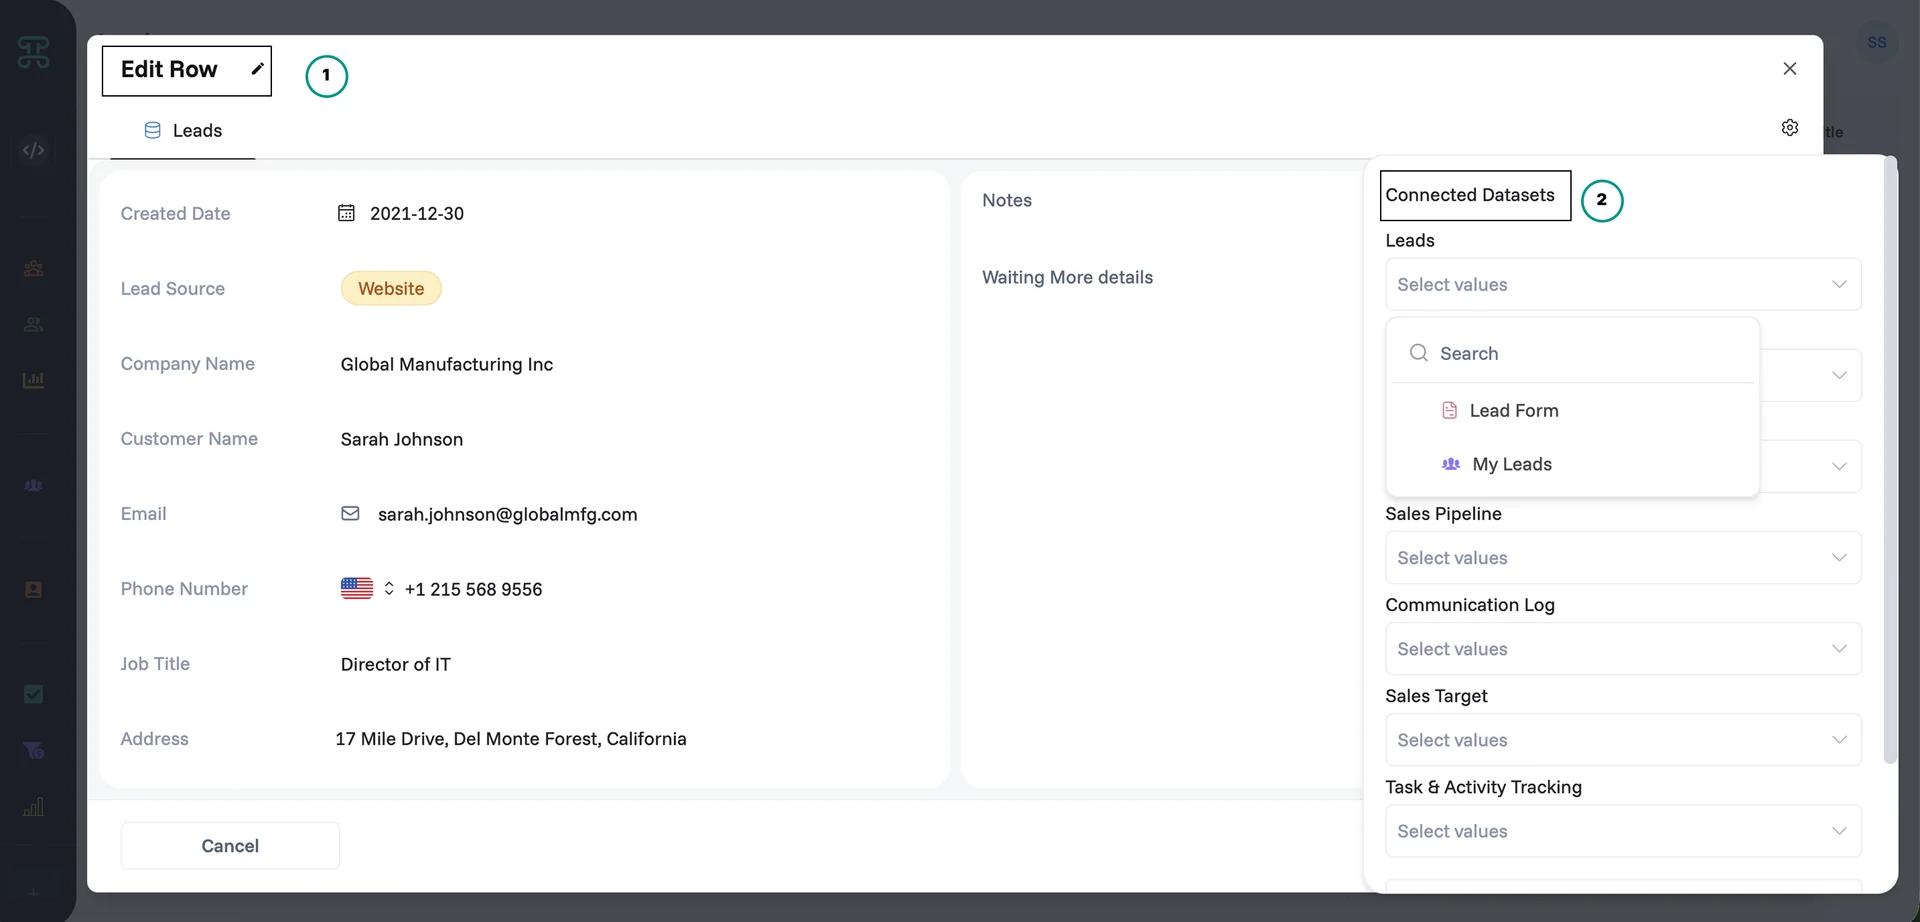
Rename the record label. Click the pencil icon next to the panel title to set what records in this dataset are called, such as Customer or Project. This label appears when you add a new row.
View connected datasets. Click the settings icon in the top right to open the Connected Datasets panel. It lists every dataset connected to this one. From here, select which interfaces from those datasets appear as tabs in the row, for example Sales Pipeline, Communication Log, or Task & Activity Tracking entries linked to that record.
Select and manage rows
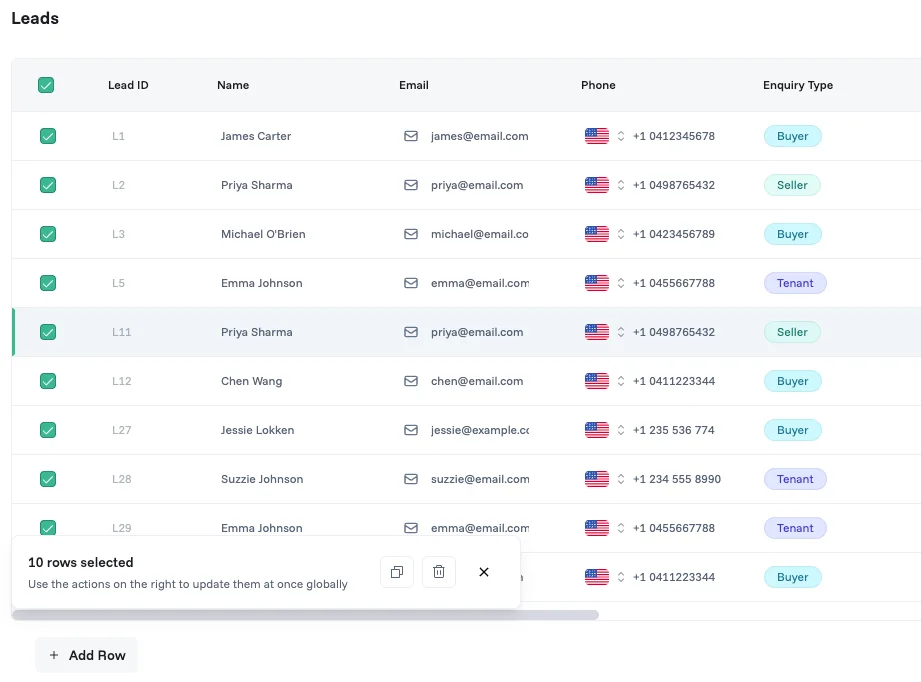
Click the checkbox on any row to select it. You can select multiple rows at once. When rows are selected, a toolbar appears at the bottom of the dataset showing how many rows are selected, with these actions:
Select all: extends your selection to every row in the dataset
Duplicate: creates a copy of each selected row
Delete: removes the selected rows
To delete a single row, select just that row and click Delete. Click × on the right side of the toolbar to deselect all rows.
Working with columns
Add a column
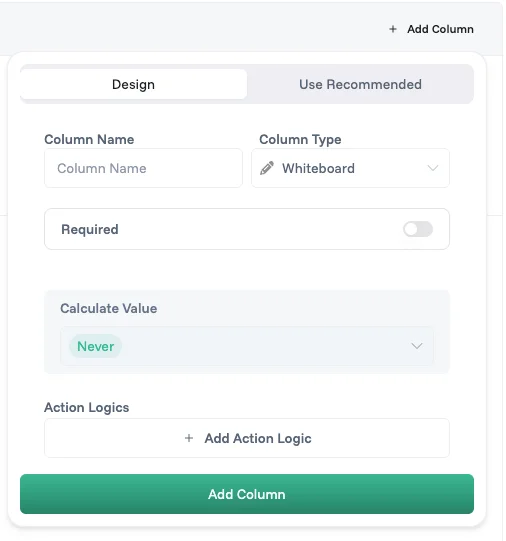
Click + Add Column in the column header row to open the column selector. It has two tabs:
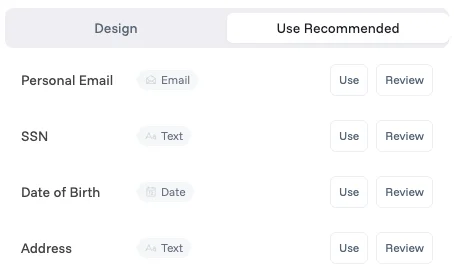
Use Recommended: displays pre-configured column templates for common business scenarios, such as project tracking and task management. Each suggestion shows the column name and type. Click Use to add it immediately with default settings, or Review to customize the configuration before adding.
Design: gives you access to the full column catalog for custom configurations. Choose a name and column type, then configure settings like Required, Max Length, and validation logic. Use this when the recommended templates don't match your needs.
Reorder columns
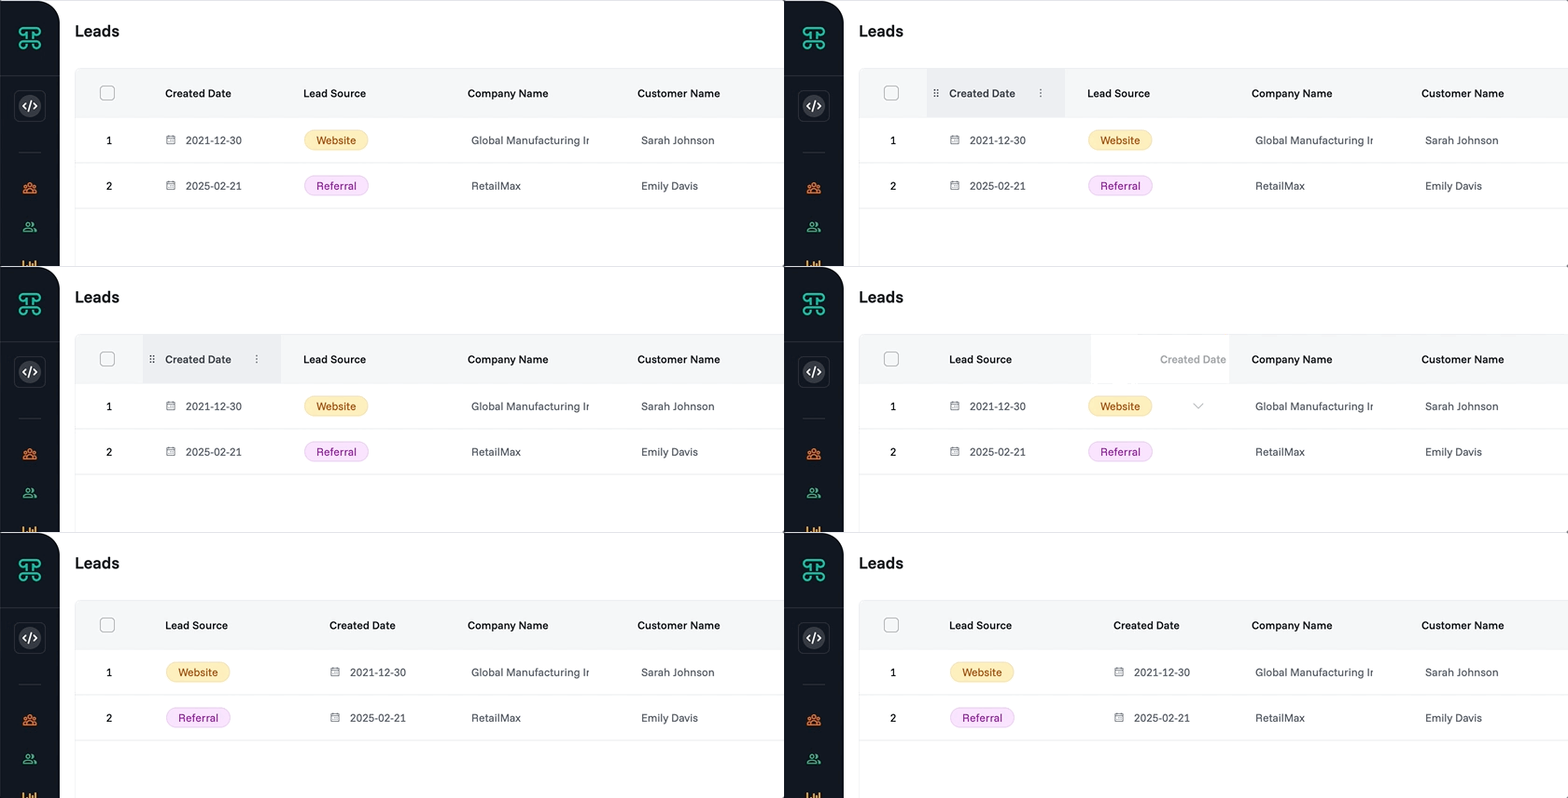
Hover over any column header to reveal the drag handle (⠿) on the left side. Click and drag it to reorder the column.
Column settings
Hover over a column header and click the ⋮ icon to open the column menu. Every column has these options:
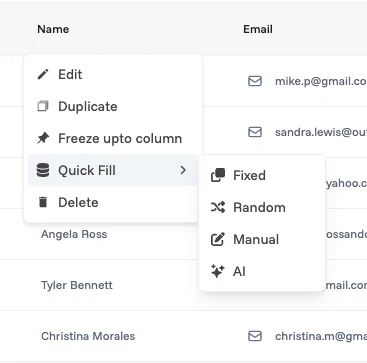
Edit: opens the column editor to update its name, type, and settings. Each setting is explained in Smart Columns under Common settings.
Duplicate: creates a copy of the column
Freeze up to column: pins this column and all columns to its left so they stay visible when scrolling horizontally
Delete: removes the column and all its data
Quick Fill: populates values for multiple rows at once. See below.
Quick Fill
Use Quick Fill to add values to a column across many rows in one step. It's available for column types where generated values make sense, such as text, number, and options columns.
Quick Fill has four modes:
Mode | What it does |
Fixed | Fills rows with the same value |
Random | Fills rows with random values |
Manual | Lets you specify a value per row |
AI | Generates values based on a prompt you write |
Note: In AI mode, type a prompt describing the values you want. Press @ to reference any column in the dataset, so the AI can use existing data as context, or press / for commands. Click Generate to preview the AI suggestions before filling.